Limited Slip Differential Installation Instructions
These are instructions are a guide to how
I installed the TRD LSD. I was doing the job on a
6-speed manual I purchased, but the 5-speed is
very similar. These instructions start after the
transmission was removed and stop before the
transmission is re-installed. I do not take
responsibility for any damage that may occur as a
result of improper LSD installation. With that
said…
Materials and Tools Needed:
Metric socket set (I think 10-14mm and a 24mm
are the only ones you will need)
Ratchet
wrench
Torque wrench
5” Vise
1.5”
diameter x 2.25” Copper pipe connector
(Lowes-UPC-039923309143)
2” diameter x 2.75”
PVC pipe connector (Lowes-UPC-025523137625)
Permatex Threadlocker Blue or Locktite 242
Toyota Seal Packing 1281 (FIPG) –P/N:
00295-01281
Multi-purpose grease
Differential bearings-P/N’s: 90366-40094 &
90366-40097
Screwdrivers-flat and phillips
head
Hammer
Scrap Wood-medium strength-(I
used maple scraps)
4” 3-2 Gear puller with
thin grapple tines (I used powerbuilt bought from
Pepboys-UPC- 028907191218, needs modified-see
later)
Miscellaneous bolts
3” C clamp
Old pot for boiling parts
Optional,
but good to have
Gasket kit-6-speed manual:
P/N 04331-12140
Instructions:
1.Remove back-up light switch. Torque: 30
ft./lbs.
2.Remove cable control bracket.
Torque: 18 ft./lbs.
3.Remove shaft assembley-
remove nut A and nut B. Torque: both 9 ft./lbs.
4.Remove selecting bellcrank assembly. Torque:
15 ft./lbs.
5.Remove shifting bellcrank
assembly. Torque: 15 ft./lbs.
6.Remove control
shift lever and dust boot-remove nut and wave
washer. Torque 9 ft./lbs. Tap out lever lock pin.
Remove the control shaft lever and dust boot.
7.Remove transmission case cover- 9 bolts.
Torque: 13 ft./lbs. Using a hammer and piece of
wood tap the case cover off. There are little
projections on the side that can be hit. Remove
the old gasket sealant.
8.Remove the lock ball
assembly. Torque: 22 ft/lbs.
9.Remove control
shaft cover- 4 bolts. 14 ft./lbs.
10.Remove
shift and selector lever shaft assembly.
Here’s where things split for the 6-speed
and 5-speed.
5-speed (will send manual
copy if needed)
6-speed:
1.Tap off
the two snap washers at the top of the input and
output shafts. These things fly off like bullets,
so make sure you know where they went!
2.Use
the gear puller to remove the two bearings at the
top of the input and output shafts. 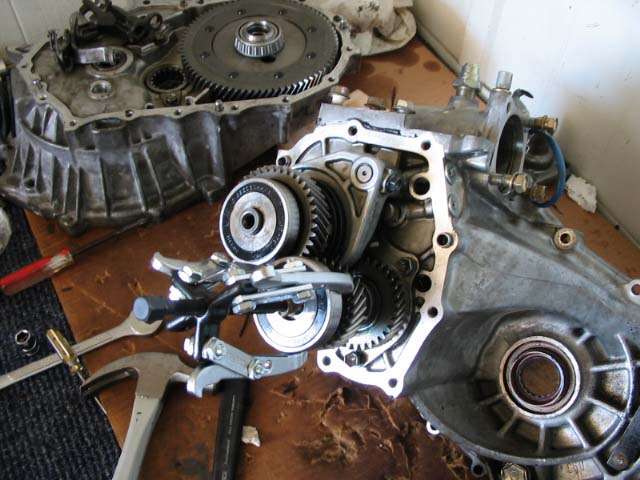
3.Remove the top gear of the input shaft.
It should come out relatively easily. Make sure to
remove the bearing and small metal ring at the
bottom.
4.Remove the bolt on the gear shift
fork. Torque: 12 ft./lbs.
5.Remove the gear
hub sleeve and gear shift fork.
6.Use the gear
puller to remove the top gear from the output
shaft. Remove the spacer ring from the shaft.
7.Remove the snap washer above the gear hub
assembly.
8.Use the gear puller to remove the
gear hub assembly on the input shaft. Hook the
gear puller tines underneath the part of the hub
without the gear teeth just above the brass
colored piece. This will give you a firm hold to
pull the gear hub off.
9.Remove the snap ring
on the input shaft below the gear hub assembly.
10.Pull off the last gear on the input shaft.
Make sure to get the bearing and two small, metal
rings that are on the ends of the bearing.
11.Use the gear puller to remove the last gear
on the output shaft. You will have to modify the
gear puller to reach the upper groove on the gear.
To do this get four metal braces from the local
hardware store (see pic). Drill out the end holes
so the bolts on the gear puller will fit through.
Reassemble the gear puller into a two tine puller
with the metal braces (see pic). Attack the tines
to the outer groove until tight. The place the 3”
C-clamp on the two tines. Pull away! 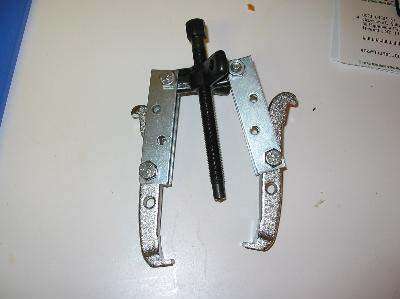
Now the 6-speed and 5-speed disassembly
are the same:
1.Remove rear bearing
retainer-5 bolts. Torque: 20 ft./lbs.
2.Remove
bearing snap rings.
3.Remove reverse idler
gear shaft lock bolt. Torque: 22 ft./lbs.
4.Remove snap washer from shift fork shaft.
5.Remove the three straight screw plugs,
seats, springs and balls with a hexagon wrench
T40. Torque: 18 ft./lbs. Remove the seat and
spring with a small screwdriver. Tip the tranny to
the side to remove ball or use a magnetic finger.
6.Remove the lock ball assembly using with a
hexagon wrench T40. Torque: 29 ft./lbs.
7.Remove the 16 bolts on the transmission case
(Three on are on the transaxle side). Torque: 22
ft./lbs.
8.Remove the transmission case. You
may need to knock out the input and output shaft
bearings.
9.Make sure to take note of how the
shafts and selectors are arranged.
10.Remove
the input, output, reverse and selector shafts.
Remove reverse gear.
Input shaft: 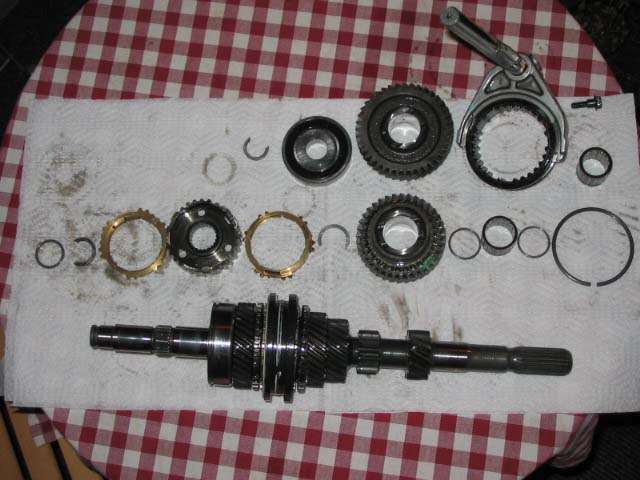
Output shaft: 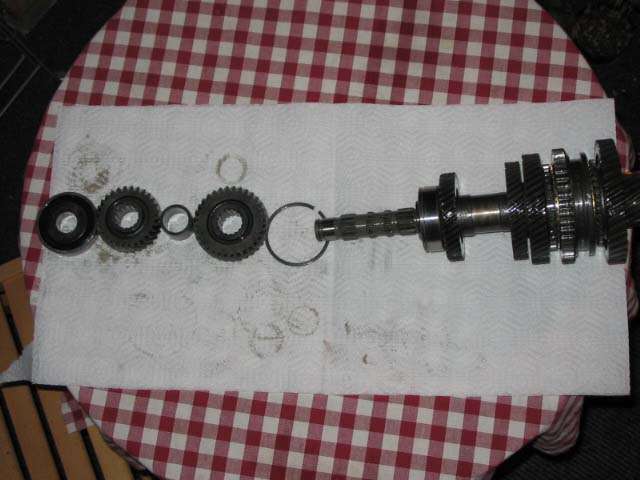
LSD Intallation*
1.Take out open
differential.
2.Place open differential in
large 5” vise. Remove the 8 bolts on the ring
gear. Torque: 57 ft./lbs.
3.Place the ring
gear in old pot and boil for a few minutes.
4.Take ring gear out and dry well.
5.Place
ring gear on LSD and screw bolts in by hand. Once
ring gear has cooled place LSD in 5” vise and
torque bolt uniformly to 74 ft./lbs.
6.Boil
bearings. Make sure you know which bearing goes on
which side by referencing the old bearing races on
the case to the new ones in the packages and
placing the accompanying bearing on the
appropriate side.
7.Using the copper pipe
connector and a piece on wood on top hammer the
bearings on the LSD.
8.Knock out the old oil
seals with a screw driver and hammer.
* I did
not replace the bearing races, because mine were
in excellent condition. If you have to remove them
it requires removing them and replacing them with
a press.
Testing-little different for
5-speed
1.Place the LSD assembly into the
transaxle case.
2.Place the output shaft into
the transaxle case slot.
3.Reassemble
transaxle and transmission cases.
4.Replace
the 16 bolts on the transmission case. Torque: 22
ft./lbs
5.Screw a blot (not sure of size found
a miscellaneous one that fit) into the top of the
shaft.
6.Test preload with a torque wrench
that can read 0.13 in./lbs. and above – this is an
almost impossible to find. I was able to bum one
off a local mechanic, but it was a lucky find.
7.The preload should be between 0.13 and 0.27
in./lbs. If preload is off take apart and replace
shim by referencing the diagram below. You have to
remove the bearing race when doing this. I was
lucky in that it was within range for me. I was,
however, told by Paul at McGeorge Toyota that it
is unusual to need to change the shim.
Reassembly-little different for
5-speed
1.Place the LSD assembly into the
transaxle case.
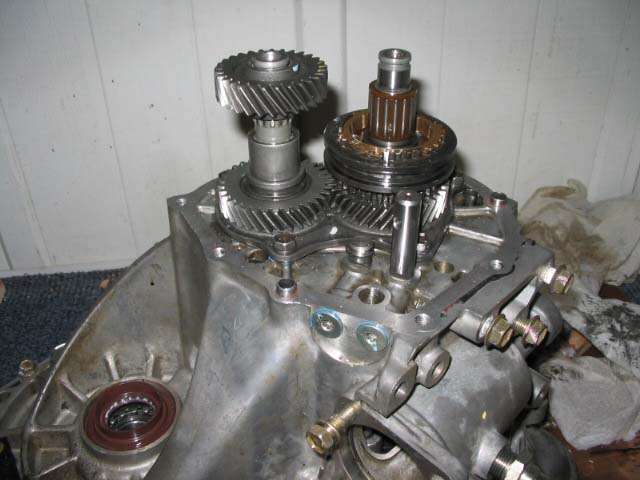
2.Reassemble the input,
output, and selector shafts and place them back in
their respective slots. This may require a bit of
jiggle and adjustment to get them to fall back
into place.
Input and output shaft in
housing with LSD: 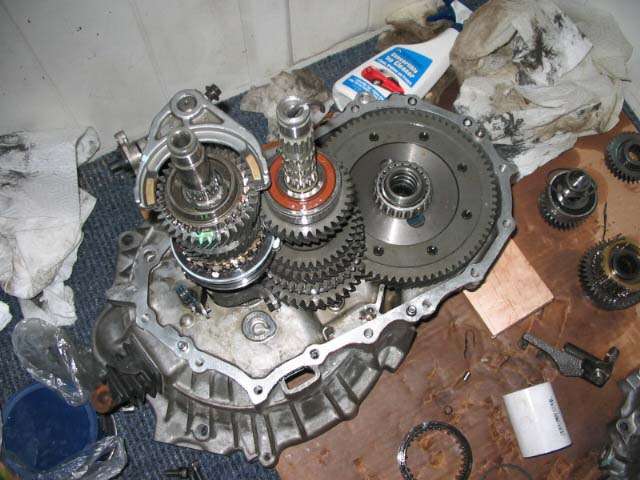
3.Place reverse gear over the reverse gear
shaft slot and reverse gear selector, and replace
the reverse gear shaft. Line the shaft up to where
you think it will probably align with the bolt. It
is okay if it is not perfect, you can align it
later.
4.Replace the bottom straight screw
plug, seat, spring and ball with a hexagon wrench
T40. Torque: 18 ft./lbs. Use locktite 242 on the
threads. Make sure the ball is on the middle notch
on the selector shaft.
5.Scrape all the old
FIPG (black rubbery stuff) off the transaxle and
transmission cases. Place a new layer of FIPG on
the transaxle case. 
6.Place transmission case upon the
transaxle case making sure the input, output and
selector shafts fit into their respective slots.
7.Replace the 16 bolts on the transmission
case. Torque: 22 ft./lbs.
8.Replace the lock
ball assembly using with a hexagon wrench T40.
Torque: 29 ft./lbs. Use locktite 242 on the
threads.
9.Replace reverse idler gear shaft
lock bolt. If it does not go in at first use a
small screw driver to line up the holes. Torque:
22 ft./lbs. Use locktite 242 on the threads.
10.Replace bearing snap rings.
11.Replace
rear bearing retainer-5 bolts. Torque: 20 ft./lbs.
Place locktite 242 on the threads.
12.Replace
all the gears, clips, bearings, etc. on the output
and input shafts. The selector fork bolt requires
locktite 242 and torque of 12 ft./lbs. When
hammering the gears on, place a block of wood
underneath the input shaft on the transaxles case
side to guarantee the outer bearing will not be
damaged. Use the PVC and copper pipe with wood
overtop to hammer parts back on. With the gear
that intermesh, hammer the static gear on first,
then place the free spinning gear on. Be careful
not to accidentally wack your finger. It HURTS!!
13.Replace the two top straight screw
plugs, seats, springs and balls with a hexagon
wrench T40. Torque: 18 ft./lbs. Use locktite 242
on the threads. Make sure the ball is on the
middle notch on the selector shafts.
14.Replace snap washer from shift fork shaft.
15.Place FIPG on the transmission case.
16.Replace transmission case cover- 9 bolts.
Torque: 13 ft./lbs.
17.Almost finished!
Replace the oil gaskets on the transmission case -
depth: 9.9 mm (0.3mm variance allowed), and
transaxle case – depth: 1.9mm (0.3mm variance
allowed). Coat inner lips of gaskets with MP
grease.
18.Clean up and have a nice, cold
beer!
по ремонту и техническому обслуживанию
автомобилей различных марок